8 min read
A Pot of Horned Violets by the Steps
Grow small flowered violas where you can see them up close, then move the pot as the weather changes.
On this page
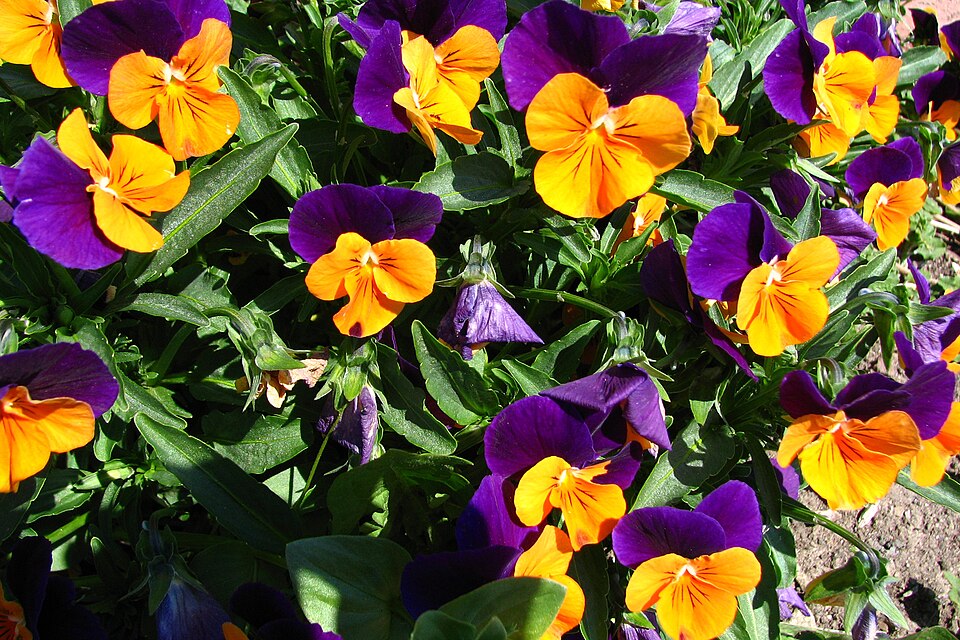
A horned violet has a face best seen from the height of a porch step. Walk past one at the far end of a flower bed and the markings merge into a patch of color. Set it near a door and you can see the stripes on the lower petals and the point where the color changes. Look from the side for the narrow spur behind the flower. A low pot brings these small details within reach and gives you the option of moving the whole planting when the seasons change.
Set the pot to one side of the steps on a landing wide enough for it to stay clear of feet and the swing of the door. The position needs enough light for the plant and easy access for the gardener. A pot that has to be carried down three steps every time it needs water will feel like a chore by early summer. Leave room to pour water over the mix and turn the pot without dragging it across the edge of a step.
Read the tag before choosing colors
Horned violet is the common name for Viola cornuta, a low perennial that spreads as it grows. Garden centers also use viola as a broad label on small flowered hybrid bedding plants. Both can look good in the same kind of pot. The name matters most if you want to save a particular plant for another season. Start with one plant labeled Viola cornuta or a named horned violet selection and keep the tag. An exact cultivar name is especially helpful if you want to find the same color again.
Choose by habit as well as flower color. For a bowl with a visible rim, look for a compact plant that spreads gently as it produces new shoots. A nursery pot with several short shoots and firm leaves gives you a stronger starting point than a tall tangle leaning out of its tray. Examine the lowest leaves and the center of the crown. A few flowers in bud will tell you the color while leaving much of the first display still to come.
Two deep colored plants separated by a pale one give a small bowl a clear pattern. A single variety can be just as good if several seedlings fill the pot evenly. Take the container with you to the nursery if the dimensions are hard to picture. Before buying a full tray, compare the spread listed on the labels with the area available at the rim.
Set the plants at the right height
Choose a container with drainage holes and enough depth to carry a useful reserve of water. A very shallow dish can look appealing at planting time and dry almost as soon as the spring wind picks up. An ordinary squat planter can provide the same low silhouette. Set it on feet or another stable support if the base would otherwise seal against a smooth landing. If you use a saucer to protect the paving, empty it after watering.
Use fresh, freely draining potting mix that holds some moisture. Water it lightly first if it comes out of the bag dusty. Set the nursery plants on the surface in their pots to see how much room each needs. If they will be viewed mainly from the door, rotate each plant so the flowers or outward shoots face the entrance. Keep a gap between the root balls and enough open surface to slide a finger into the mix when you check moisture.
Ease each plant out, resting the top of the root ball between your fingers. Plant it at the depth it grew in the nursery pot and keep loose mix away from the crown. Leave a little space below the container rim to contain water. Water slowly until the new mix and the root balls are wet and water runs from the base. Check the level afterward. Mix can settle enough on the first watering to expose the shoulders of a root ball.
Let the weather decide where the pot lives
Flowering is often best in cool weather. A position with sun in spring can give the plants plenty of light before nearby trees leaf out. A porch that feels pleasant in April may receive heat from paving or a west facing wall later in the season. Pay attention to the pot itself as well as the air. The side against a wall can grow warm while the leaves of the violet are still in partial shade.
When afternoons turn reliably hot, try a place that receives morning sun and has open shade later. A step on the other side of the door can be enough of a change. If space is limited, place the pot so a taller container shades its side and leaves the violas in the light. The pot also needs fresh air. A dark recess with a low ceiling can trade heat stress for slow drying and a sparse display.
Check a moved container again after two or three sunny days. A plant that used to need water daily may take longer to dry in its new place. At a rainy site, the opposite adjustment can matter. Move a constantly soaked pot under a bright overhang for a spell and water it yourself when the surface begins to dry. Pot positions near roofs can receive a concentrated drip even during a short shower.
Check the roots before reaching for water
Push a finger just beneath the surface, first beside one of the original root balls and then farther out in the fresh mix. The two can dry at different speeds until the plants root into the whole container. If the center is dry, pour a little water over each plant's root zone and wait for it to sink in before you finish watering the pot. Once the planting is established, water thoroughly as needed and allow surplus water to escape. A quick splash darkens the surface while the root ball underneath can stay dry.
A drooping plant asks for a closer look. If the mix feels light and dry, water and see whether the foliage firms up once the plant is out of the heat. If the mix is wet and cold, check whether the base can drain and give the roots more air. Sun and wind can make a leafy pot use water faster just as buds are opening. Touching the mix at the same time of day for a week will teach you more about the site than a schedule copied from a nursery label.
If leaf color fades across the whole pot after several months, look at the drainage and roots before feeding. A low rate of container fertilizer according to the label can support an actively growing planting in depleted mix. Feed makes least sense during a hot spell when growth has slowed and the plant mainly needs relief.
Keep the flowers visible
Follow a faded flower back to its individual stalk to remove it. Doing this every few days during the main display tidies the bowl and limits the seed pods that develop. Spend a little time looking below the flowers, too. Leaves or petals with irregular holes may lead you to slugs hiding under the rim, beneath a saucer or in the damp gap next to a wall. Check in the evening and move the pot away from a known hiding place if the trouble recurs.
By the end of the first flush, older stems may lie along the rim with fresh growth crowded at their tips. Remove faded stalks and shorten a few of the longest shoots back to healthy foliage. Leave growing tips where they fill open parts of the bowl. Try the tidy on one side first if the weather has been hot or the roots look weak. Watch where new growth appears over the following week or two in cooler conditions. That shows you whether the rest of the plant will respond well to the same treatment.
Some gardeners enjoy the surprise of a volunteer in a nearby pot. Let one or two heads ripen if seedlings are welcome and collect the rest before they scatter. A seedling from a named selection may have a different flower color or habit. To keep the exact plant, retain a live piece of it and label it with the name from the original nursery tag.
Decide whether the pot is worth keeping
Look below the flowers at the end of summer. A pot with firm leaves and small new shoots close to the base has a good chance of filling in again in cooler weather. Move that container into a position with better light as the days shorten and keep it watered when the mix needs it. A bowl that has lost most of its crowns and contains a compact mass of roots is a better candidate for replanting. Keep a small section of any plant that still has healthy shoots and roots if its flower is one you want again.
In a place with cold winters, a freestanding pot can freeze more deeply than a garden bed. If keeping the violets, choose a sheltered place with drainage and keep the pot under observation through the winter. A sheltered outdoor wall can suit a mild climate, while an unheated sheltered space may help in an area that experiences repeated hard freezes. Check a local nursery or extension guide for hardy selections and suitable protection. A plant in a sheltered pot still uses some water during mild, dry periods.
A spreading established clump can also be divided in a cool spell when new growth is starting or conditions are mild enough for roots to settle. Lift the root ball and separate it into a few pieces that each carry healthy shoots and roots. Pot up a small piece to refresh the doorway planting, water it in, and allow room for new growth. Set the label where you can read it next spring. When the first buds open, the pot can come back to the step where a visitor will see the markings at close range.
Further reading: Royal Horticultural Society guide to horned violets.