7 min read
Bring Sweet Alyssum Over the Rim of a Porch Pot
Give sweet alyssum the light and water it needs at the edge of a mixed container, then decide when a light trim can bring back flowers.
On this page
The rim is a difficult place to water once a pot fills out. Leaves hang over the edge. A tall plant in the center catches much of the first splash. Water runs down a space beside the rim before the shallow roots have had much to drink. Sweet alyssum makes this part of a mixed container worth paying attention to. Its small flowers sit close to the rim, and the tips of the stems can soften the outline of the pot. If the edge plants keep drying out, the display may develop a bare crescent on the side you see every day.
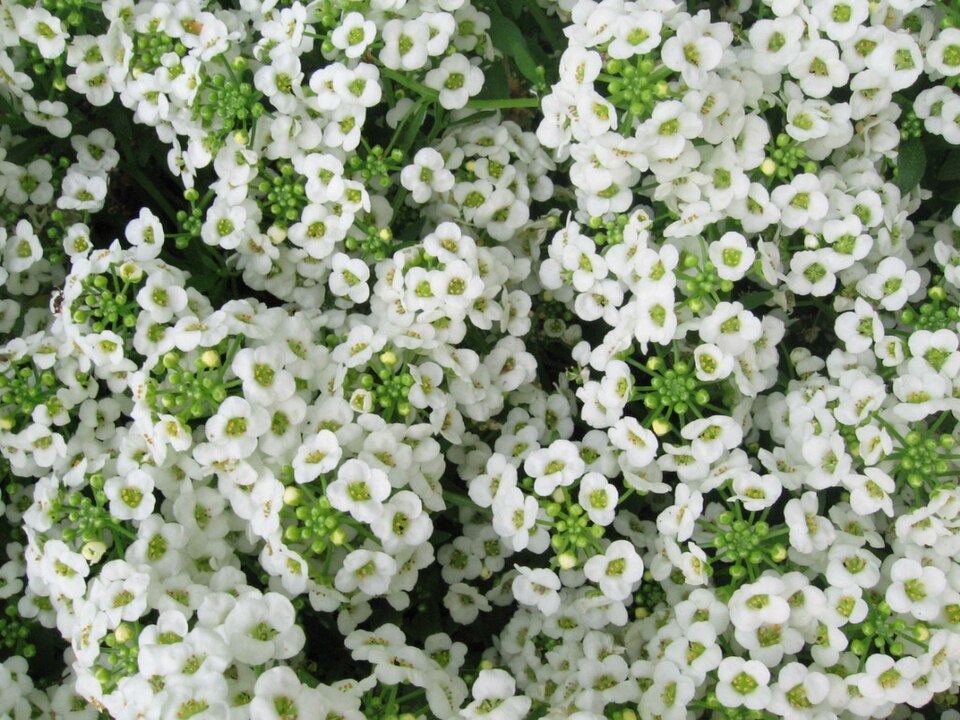
Sweet alyssum, Lobularia maritima, grows low and spreads sideways. Its white, pink or purple flowers are small enough to be seen together as one surface. A familiar white form gives clear contrast against a dark pot. The lighter flowers can also show up at dusk before the taller foliage disappears in the shade. Choose where you want the spill to be seen first, then place the plants to give it room.
Set the main plant before filling the front
Put the empty pot in its summer position while you can still carry it alone. Watch where the afternoon shade falls and where wind reaches the rim. In a mild growing season sweet alyssum can do well in full sun. In a hot setting, an hour-by-hour check may reveal that a little afternoon shade protects the alyssum while the pot still receives a bright morning. Think about the surface under it, too. Stone beside a west-facing wall can stay hot after the air cools.
Set the main plant inside the empty container in its nursery pot or lay out its root ball on a sheet of paper. Use the number on the tag for its mature width. An upright plant can share space well if it keeps most of its leaves higher than the alyssum. A broad plant that brings its lowest leaves down over the whole rim will eventually shade the mat. In a small pot, one modest upright with two edge plants may give the right outline and still leave a few clear spots for watering.
Place the alyssum near the edge, with enough mix between the plugs and the side of the container to support the roots. Space plants for their label width. Some seed-grown varieties form tidy low cushions. Vigorous vegetatively propagated forms can cover much more ground and take over a tight mixed pot. One large plant may do what three small ones would do. Pick a single growing habit for the edge so you can anticipate which stems will reach the rim and when.
An upright dwarf snapdragon can share a cool spring display if both plants suit the site. For a pot planted for foliage, compare the amount of shade the central plant needs with the hours of light the rim will receive. Look for a nursery tag with similar moisture guidance for both. Watering the center and the edge separately helps during establishment, though the roots will begin to share the same mix.
Give small plugs a way to get started
Nursery plugs make sense when you want the pot to come together quickly or the outdoor seedbed will be hot. Look for leafy plants with sound crowns and roots that hold the mix without forming a dry, hard mat. Water the plugs before setting them out if they seem light or brittle. Slide them into the pot near their old soil level. A plug planted down in a hollow may collect water and debris. A plug left partly exposed can dry before new roots grow outward.
If you want to raise your own plants, sow in a fine starting mix and press the small seeds down gently. Sweet alyssum germinates well with light, so follow the packet on whether to leave it on the surface or add a very light cover. Keep the seed zone moist without washing the seeds into a pile. A bottom watering can help when the top is fragile. Once you see the seedlings, give them air and ample light. Raise a few extra if you want to fill a future gap without dividing an established clump.
Move young plants outdoors gradually. Find out how long the leaves have actually spent in direct sun, wind and rain if the plants came from a covered bench. Harden off tender new stock during a suitable local spell. A nursery plant may handle cool weather after adjustment, but the companion plant may be less tolerant. Use the needs of all the plants when you decide to set the pot out for the season. Water after planting and recheck how evenly the mix settled along the rim.
Find two places to check for water
Choose a spot near the tall plant and a second just inside the rim. Press a finger or a narrow wooden stick into each spot to compare moisture under the surface. During a mild week both areas may dry at much the same speed. During dry wind or bright weather, the rim can be much drier. Notice where the alyssum root plugs were when you planted. For the first few weeks, those little islands of nursery mix may react differently to water than the larger pot around them.
Pour at an open patch along the edge, then move the spout around the pot, giving the mix time to absorb water. If water appears at the bottom immediately, pause and check whether it ran through a dry gap next to the wall. In a well-watered pot, the deeper mix should feel damp where you can reach it. Let the extra water leave through the drainage holes. Empty a catch tray after watering wherever it would otherwise keep the roots in water. Enough air below the rim affects the plant as much as the flowers you see above it.
Compare the habits of the plants as they mature. The center plant can become the biggest consumer of water, even though its leaves once made the rim feel dry. Roots expand into the same container from several directions. An alyssum that repeatedly wilts on one side of the pot may need a clearer path for water. If only the part facing the wall tires, turn the container if the arrangement still looks right from the door. A pot exposed to different conditions over a few feet can behave like two planting sites.
Trim a small patch during a lull
Sweet alyssum often flowers most freely in cooler conditions. In a long hot spell, it can make fewer buds or pause flowering. Check the green parts before you give up on it. A tuft with firm bases and leafy shoots may grow again as the weather moderates. If the whole stem is brittle to the base or the crown has become soft, trimming will do little. Look at the plant after a thorough watering and a cooler morning, when short-lived wilting is easier to separate from declining growth.
With clean snips, cut a tired patch back a little to leafy growth. The goal is to shorten some stretched stems and clear faded clusters while leaving enough foliage to feed new shoots. Keep adjacent sections in place so the pot holds its shape. If the trial cut responds with fresh tips, work around the rest in stages. Choose reasonable weather for the job. A pot that is already dry, exposed and struggling is less likely to respond to a wholesale haircut during the hottest afternoon of the week.
A move can be more effective than trimming when flowers are fading on the side that faces a hot slab or wall. Find a bright shelter that stays within reach of the regular watering route. The other plants still need enough light to keep growing well. When evenings cool, look for new buds along the shortened stems. Continue to water according to the mix. A smaller canopy will sometimes use less water for a while, and you may have to lengthen the time between checks.
Leave a little room for the next change
Sweet alyssum can seed into nearby spaces. Inspect the ground under the spill, especially where soil collects between bricks. If you want to limit seedlings, remove spent clusters before they shed seed and pull stray seedlings while the roots are small. Some cultivars sold from cuttings produce little or no viable seed. Ask about the selection when uncontrolled volunteers would cause a problem. Check local planting guidance if you are near natural land where sweet alyssum has escaped cultivation. In a region where it is discouraged, use a locally suitable low flowering plant for the same job.
At the end of a cycle, look at the pot from the place you use most. Write down which section of the edge filled first and which plant needed the most frequent watering. If the front looks bare because another plant grew over it, give that plant a smaller share of the pot next time or move the alyssum into a pot with a wider rim. If the edge ran too far, use fewer starts. Replacements take less guessing if you can picture the fully grown pot before putting the first plug in place.
A small patch of visible soil can be a good thing in a mixed container. It leaves a place to water, an opening for light and a clear spot to introduce another plant after the first display has run its course. Let the sweet alyssum spread toward the part of the rim you see best. The low flowers can give that one side all the finish it needs.
Further reading: University of Wisconsin Extension guide to sweet alyssum.