7 min read
See Solomon’s Seal Sideways Along a Shade Path
Place the arching stems where you can see their hanging flowers and check what has eaten the leaves after bloom.
On this page
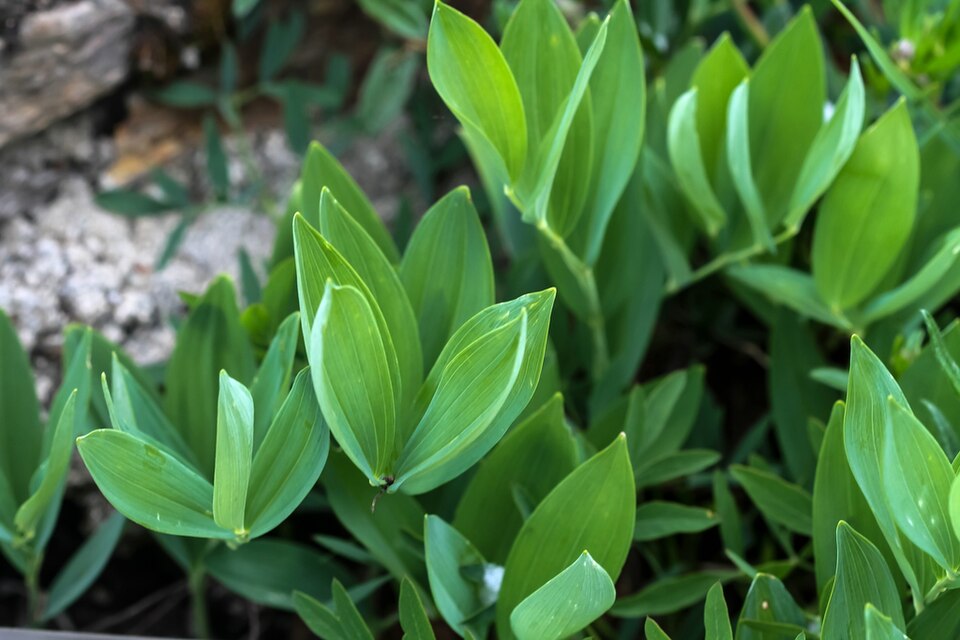
The flowers of Solomon’s seal sit underneath its arch. From over the top you mostly see a row of broad leaves. Move sideways and the short hanging flowers line up beneath the stem, sometimes visible from quite far down a path. Use that shape when you plant it. Give the stem a clear background, leave space for the outer leaves and keep enough access to see their undersides. The path view is useful for more than the display. It makes it easier to tell which part of the plant has been damaged as the season goes on.
Angled Solomon’s seal, Polygonatum odoratum, is a rhizomatous perennial. Its flowering stems can reach roughly half a meter to a meter, with size varying by plant and conditions. In late spring or early summer, the creamy flowers often have green tips. Some plants sold under the same common name are different species or named varieties. Use the full label to estimate the spread and size of the one you have. The garden effect is made by whole stems leaning together, so width below the arch is part of the planning.
Find a quiet background for the arch
Look along the path at the height the stems are likely to reach. A dark quiet plant, a shaded fence or open ground in front of a shrub can provide a good background. Set the trial plant or a marker where you can see the side of the arch when you approach. If it stands at the back of a deep border and you usually look down from a terrace, the flowers may be hidden even when the leaves are prominent. Put it where one side of the stem remains visible without leaning over the plant.
Check the eventual reach rather than only the footprint of the pot. An outward bow can touch knees or lie over a low marker. Leave room for other plants to show at the base and make a clear way to reach the Solomon’s seal later. Where you want a sheet of arching stems, allow the clump to expand gradually. Repeating the spacing of a row of small nursery plants too tightly can give you several hard-to-separate patches before you have learned the behavior of a mature clump.
Keep the plant separate from edible beds. Some plants can set dark berries after flowering, and the plant is harmful if eaten. Choose a position where children and pets are unlikely to chew it, and keep any material you lift or trim appropriately out of their reach. The foliage and pendant flowers are plenty of reason to grow it as an ornamental. Give people space to see the details without brushing or handling the stems.
Settle the roots in a sheltered piece of soil
Look for a site with light shade and reasonably fertile soil that stays moist but drains freely. Some situations with more sun can suit angled Solomon’s seal if it receives enough water and the exposure is manageable. Deep dry shade beside demanding roots can be hard for a young plant. Compare a sample of the earth below the surface after a rain and at the end of a dry spell. The ground should allow the roots to establish without sitting in an airless pocket.
Fit the plant around established trees without cutting major woody roots or burying the base of a trunk. Set a potted plant at its existing depth and water the soil around the root ball. Small roots and newly emerging stems can be brittle. Hold the lower pot or body of the root ball while making the move. Avoid gripping a stem as a handle. Mark the clump from the path and leave clear enough ground to see the shoots as they emerge in spring.
Where the surroundings dry unusually fast, apply water thoroughly when the root zone needs it and check how far the moisture reached. A light covering of leaf mold around the plant can help in suitable ground, but keep the growing points clear. Before adding mulch to a damp bed, see whether water is consistently collecting around the stems. The position should remain manageable in wetter months as well as in the middle of summer.
For a longer border, make a brief side view drawing before planting another species in front of the arch. A low ground cover near the path can leave the hanging blooms visible, while a tall clump at the same position covers the lower stems. Decide which gap you will use to reach the leaves after flowering. On a slight slope, the view can change within a couple of steps. Place a removable marker where you can stand securely and see several stems from the side. Use that marker after rain to check whether the heaviest stems still clear the walkway.
Look under a damaged leaf while the marks are fresh
After flowering, inspect any stem with chewed leaves. A few irregular holes can come from slugs, snails or other causes. In regions where Solomon’s seal sawfly occurs, groups of pale larvae with dark heads can feed below the leaves and remove elongated strips of leaf tissue. Check multiple leaves, including the undersides. Look for larvae or fresh feeding, and compare the damage with a reputable local identification guide. A photo taken from above rarely shows what you need for a confident conclusion.
Note whether most injury is recent or whether you discovered dry remnants of older feeding. Seeing a stripped stem after the larvae have finished feeding is different from seeing active larvae on a young clump. Often the main flowering display has already passed before this damage becomes conspicuous. The RHS notes that established plants can often return the following year even if they lose their leaves. Where damage and plant vigor allow, leave the stem and check its neighbors before taking any action.
If ongoing damage matters and larvae have been identified, hand removal may be practical on a small clump. Use gloves and follow local advice for the insect you have actually found. Where the pattern is mainly on low leaves and you see fresh slug trails nearby, look for damp shelters instead. You do not need a response for every ragged leaf. A few groups of intact leaves across the arch can keep the planting attractive while you learn which injuries recur.
Follow the stem into its ordinary decline
Watch healthy and recently damaged stems side by side as the season progresses. A group that gradually yellows and dies back toward late autumn is taking a different course from a few stems that suddenly lose their leaf tissue during active growth. Mark anything that looked unusual so you can compare the new growth in spring. Remove old tops after they have declined if they make it difficult to reach or inspect the area. Cut close to the base without digging into the soil. Keep the crown marked through winter when the bed may look empty.
If one stem falls onto the path, check whether the plant has grown into a narrower space than expected. Set a loose unobtrusive support while it is still upright next year if that will solve a small problem. If most of the arch lies across the walk, reposition part of the clump at a suitable time or give the path more clearance. A tightly tied bundle loses much of the sideways shape you planted it for. Solve the room first and leave the remaining stems free to grow as they naturally do.
An established clump may be divided in spring when conditions suit and you have a purpose, such as creating a second arch in another open space. Find a sound piece of rhizome with a healthy growing point and roots. Keep it moist through the move and handle emerging shoots gently. Replant the portion at an appropriate depth and give it attention as it settles. Mark the old area and check for pieces you meant to leave or remove when shoots are visible again. A healthy planting with enough room can stay in place for years.
Choose what to repeat farther along the path
Return during the flowering period and check the view from several ordinary positions. From one direction the arch may be clear while another shows only an overlapping mass of leaves. The way changing light reaches the underside of the stems can determine where a second clump would be most effective. You may only need to lower a neighboring plant's foliage out of the way or preserve a gap between two separate clumps.
Keep a simple note of the positions at which the flowers were visible and the first leaf damage appeared. You can use both observations in planning the next planting. A mature clump works well where it still gets enough water, the stems are fully seen, and you can reach their lower leaves after bloom. That arrangement makes the seasonal changes easier to notice and gives you room to respond only where it helps.
Further reading: Royal Horticultural Society profile of angled Solomon’s seal.