7 min read
Cut Some Purple Coneflowers and Leave Some Cones
Use a three part plan for the vase, the summer border and the seed heads you want in autumn.
On this page
The first coneflower looks like an easy choice for a vase. Its neighbor is just opening, and several more buds promise enough flowers outside. A month later it is easy to deadhead every stem with the same motion and find that there are no seed cones left for fall. Decide what each group of stems will do while you can still tell them apart. Some flowers can come indoors, some spent heads can be removed and some healthy cones can stay on the plant. You can make all three choices within a clump without dividing the whole border into separate jobs.
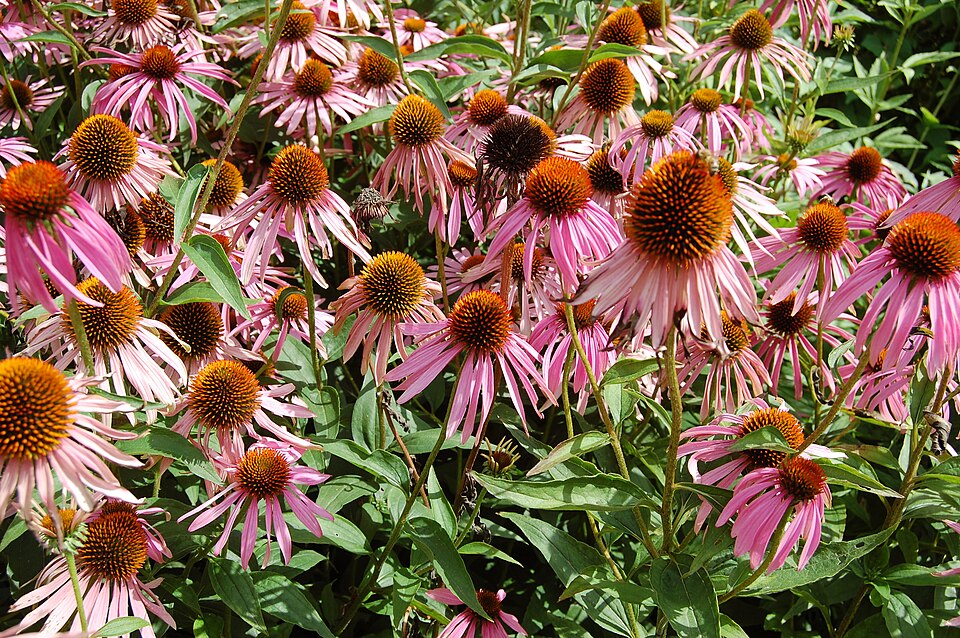
Eastern purple coneflower is Echinacea purpurea, native to parts of central and eastern North America. Its recognizable flower has purple or pink rays and a raised bristly center, with named selections that vary in height, color and shape. Buy locally suitable stock and confirm the size on the label. Native habitat considerations depend on where you garden. A good position for an ornamental clump is one you can reach during bloom and still see in the season when the rays are gone.
Place the clump for both of its main shapes
Look first at mature height and spread. Choose a sunny position with soil that drains and room to check more than one side. Some partial shade can be suitable. If a nearby plant grows taller later in the season, think about how it will affect the light to the coneflower. A mature head in a narrow walkway is much more likely to be knocked than one inside a generous edge. Put the center far enough away for its widest stems to remain useful after rain. Reserve a spot where you can stand while cutting rather than leaning across a delicate companion.
Picture the winter form as well. Several bare cones can be clear from a window against a quiet background. If you have a view onto a wall that catches morning light, leave the healthiest stalks on the side you can see there. Along a working path, reserve the inner part of the bed for standing cones and use the outer stems for summer cutting. That makes cleanup easier, since the seed heads need not remain exactly where you used to pass at the height of bloom.
Plant in a suitable season and give new roots water while they establish. Start with soil that is fairly open, with no persistent water at the crown. Set the plant at its nursery depth and check whether the original root ball dries more quickly than the soil beside it. Water thoroughly where needed, then allow good drainage. An established clump can cope with a degree of dryness, but use soil conditions before irrigating during prolonged dry weather. In a busy bed, apply water where it reaches the root area instead of repeatedly wetting the whole flower canopy.
Choose a few flowers for the vase
Pick a stem whose rays are opening or have just opened and whose foliage is sound. Look at its lower branches before cutting. You may need a long stem for one vase and a shorter one for another. Take the amount you need, leaving useful leaves and flower-bearing branches where possible. For a first cutting, choose from plants that have enough other stems to continue their display. Taking the one tall stem a young plant made can solve the vase problem at the expense of all its flowers outdoors.
Check the result from the path after you cut. One hidden bloom removed from each side of a clump can be hardly noticeable. Removing every tall flower from the edge a person sees first can leave a larger gap than expected. Use clean snips and a clean container of water. Remove leaves that will be submerged. If you grow more than one variety, record which flowers held up and how much stem length you could leave outdoors. Some short stems can be just right for a small container even if they looked too low in the border.
Take a little from each wave. There is no need to keep cutting when the plant has few fresh buds, especially on a newly established clump. Watch for new growth below earlier cuts and adjust how far down you go. If the rest of the plant is healthy, it can be interesting to compare one stem you cut at a branch with one left to hold its first cone. The differences are easier to interpret when both stems have similar exposure and vigor.
Deadhead where fresh flowers matter
In midsummer, remove fading flowers from the section you want to keep neat or encourage to continue blooming. Follow a spent stem to a useful branching point and avoid damaging the buds around it. Check both sides of the clump while you work. A head close to the ground can remain out of sight and shed seed even as the main stems are regularly cleaned. Keep a few marks on a sketch if you intend to retain particular cones rather than relying on memory from the last visit.
Look closely at distorted flowers before deciding what to leave. Aster yellows can produce abnormal green flower parts and distorted or yellow growth. Mites and other problems may also distort a cone. One strangely shaped head is a reason to examine the whole stem and compare other growth, not enough for a definite diagnosis. Give clear photographs to a local extension service or plant clinic if the symptoms are concerning. If aster yellows is confirmed, follow appropriate removal advice and avoid putting the affected plant in an ordinary cool home compost pile.
Give the clump space if it has become crowded. Cut routine fading heads while retaining healthy foliage, and consider division at a locally appropriate time if several outer stems have little room to grow. A narrow opening that lets you inspect the base can be more valuable than another pot in the same space. Avoid letting wet or declining neighboring foliage cover the coneflower's crown for long periods. Keep an eye on the portion you intend to leave standing so you can see whether its stems are healthy.
To keep the three jobs clear, take a simple picture of the patch from the side where you usually work. Note which stems are shortest, which are clearest from the terrace and which tend to have the best flower heads. That is enough of a map. Use it when the next set of heads begins to fade. It is easier to give the back of the clump a few useful tall stems while you still have a picture of the whole shape. During a week when there is no need for indoor flowers, leave the fresh stems visible outdoors and keep the other two jobs on their own schedule.
Save the sound cones you want to see later
As the main bloom season winds down, choose sturdy healthy stems for seed heads. Leave them where they can remain upright and clear of traffic. The dry cones can feed seed-eating birds such as goldfinches where those birds are present. They also give a border visible structure after many nearby flowers are gone. You do not need every cone to serve that purpose. A few groups of sound stems can carry the view, with room around them for cleaning the rest of the area.
Look for volunteers when seed has had time to fall. Keep wanted seedlings where conditions suit the plant and remove excess before they crowd slow neighbors. Seed-grown offspring can differ from named plants. If you want the next group to match its parent, obtain known stock or divide an established plant where appropriate and permitted. Leave a tag with the standing stems through winter so you can see which part of the clump naturally kept its shape and which part was maintained for cut flowers.
Once the old stalks become damaged or interfere with new growth, remove the ones that have served their purpose. Work close enough to see the emerging shoots without trampling them. Keep the area open where you plan to reach next summer. A selection of old cones can remain useful even if others topple after a storm. Use their actual position rather than expecting all the seed heads to behave alike. This lets you keep the structure where it remains attractive and clear the rest when it is convenient.
Compare the three uses before you expand the bed
At the end of the growing season, pick the spot that was easiest to reach for a vase, then the spot where the border carried the strongest display and where the dry cones remained visible. They may be the same place, or three different parts of the planting. Add space only where it will improve one of those results. If you always cut from the pathway side, place the next group where you can reach more stems without shifting other plants. If standing cones were the main late interest, leave a clear background and set the next clump where it will have room to grow to full height.
Further reading: Iowa State University Extension guide to growing coneflowers.