7 min read
Fit a Tall New England Aster Behind a Low Border
Use the height of a fall aster to your advantage and pinch only part of an established group when testing later bloom.
On this page
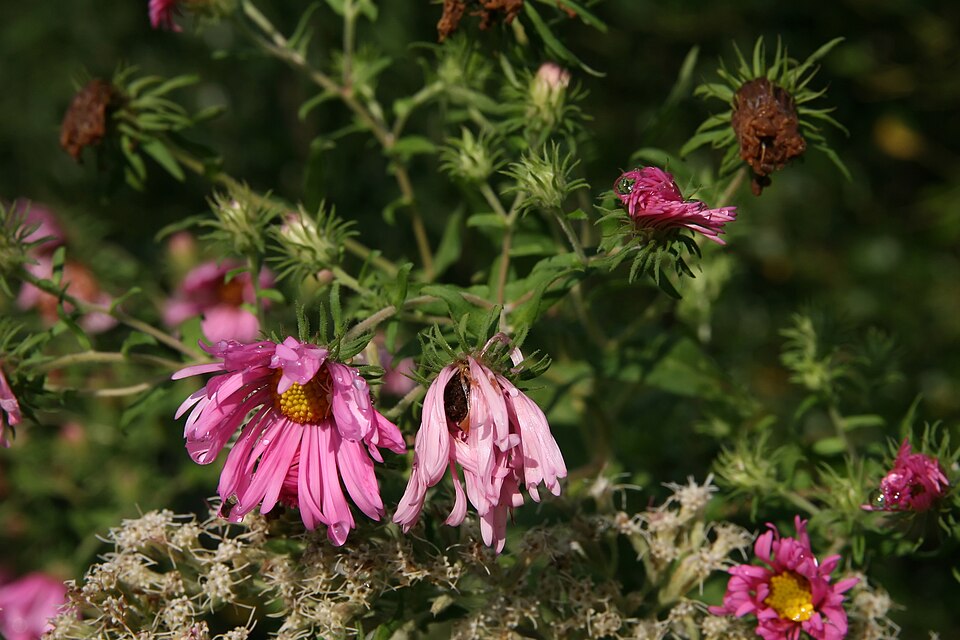
A New England aster in late flower can seem to float above the lower plants in a bed. Stand close and you may see a tall collection of stems with gaps near the base. That is useful information for designing the border. Put it where the flowers can rise over a lower plant and leave enough space between those plants to inspect them. The tall stems can support part of autumn's view without asking the lowest leaves to look like a compact edging plant through the entire season.
New England aster is Symphyotrichum novae-angliae, previously known as Aster novae-angliae. It is a perennial native to parts of North America, with many named forms. Mature plants can be quite tall, commonly reaching several feet under good conditions, and the flowers are usually pink or purple. New York asters and annual China asters are different garden plants. Use the full name and the expected height and width when choosing a spot. Let the mature height decide the arrangement before trying to alter it with pruning.
Decide where the top and bottom should be visible
Mark the outline of the new plant on the ground. Put a stake at about the expected height and look toward it from a chair, a low path and an ordinary doorway. A tall back row of flowers can bring light across a quiet bed in the fall. The same row may block the view into a shorter neighboring planting. Adjust the position to create one clear view of the flowers rather than trying to fill every open stretch with the highest plants.
Choose a lower front plant that fits the light and soil. Leave enough space so the mature foliage of the two plants does not make one wet, inaccessible mass. A modest gap lets you see the aster's lowest stems and reach a stake with little disturbance. The front plant can cover part of the base from the usual viewing angle while maintaining its own distinct crown. Stand farther along the path and check whether the same low foliage will hide a small aster cultivar entirely. The mature size on both labels matters.
Choose an open sunny place with soil that retains moisture but drains freely. Compare whether a nearby shrub will shade the bed or take up water during summer. Keep room to irrigate at the soil level and inspect several stems before they become crowded. If the site has a narrow gap far from an open side, look for a shorter, locally suitable cultivar. A shorter plant is a useful choice when you want the flowers near a path without placing a large frame behind them.
Put a small amount of support in early
Place sturdy stakes or a suitable frame while you can reach the soil. Set supports back from the walkway. Leave enough room for the stems to develop without pressing against a tight tie. An established aster may need little help in a protected position, so consider how the clump actually leans. A small sideways stretch is different from an entire branch dropping across the walk after every rain. Place the support where the stems will naturally settle instead of pulling every branch into one standing bundle.
After planting, water while roots establish and check moisture below the surface during warm weather. A vigorous aster can outgrow the length you originally expected for its supports. Look at it again midway through the season. If most stems still hold their own weight, leave them free and protect only the route that matters. If a whole group leans toward an opening in the light, reconsider the location or surrounding shade when you revise the planting next year. A taller stake can hold the plant for now without solving that longer-term problem.
Secure one sound stem gently if it moves against a support in wind. Use material that will not cut into growing tissue and leave the upper part free. Check lower leaves while you have the canopy open. An unexpected dry gap or several yellowing stems can get lost behind the front plant. Keep a way to reach the root area and water without moving another large perennial.
Make one early trial of pinching on an established group
If you want to compare timing or branching, choose an established patch with enough vigorous stems to work with. During suitable early active growth, pinch the tips of part of the group and leave the rest as a comparison. Follow local guidance on timing. The treatment can encourage branching and may delay flowering, and the result varies with cultivar, site and season. Cutting too late can cost the display you were trying to manage. Leave young or struggling plants to establish normally before planning a trial.
Use two labels or a simple sketch to identify which stems you pinched. Compare the first flowers when they appear, the amount of branching and the height at which the blooms sit. Keep the root conditions similar where practical, and note if one side receives considerably more sun or moisture. An unpinched stem on a brighter side may flower sooner for more than one reason. The point is to learn how your own border works, rather than proving that one method will give the same result everywhere.
A change in height is not automatically an improvement. Look from the path when both sides are in flower. A shorter branch can place blooms directly behind the front foliage, while a taller one can lean toward the walk. An earlier opening may be more useful before the weather becomes cold. If the pinched part made a later, well-branched display, leave some shoots as a follow-up in a similar spot next year. If the effect was too late or uneven, keep the intact growth and try a shorter cultivar where height is the issue.
Read the condition of the lower leaves
New England asters can show leaf decline lower on the stems. First check how the leaves are arranged. A tall border plant often gives a clearer view of the flowers than the base, and a healthy low neighbor can soften that outline from the path. If the lower leaves carry active pale powdery patches or wilt spreads across several apparently healthy shoots, examine them separately. Moisture, airflow, pathogens and root conditions can all affect an older plant. Take useful pictures and seek local identification when symptoms are serious.
Keep the two kinds of cleanup separate. Trimming leaf material for appearance is a small job when the plant is otherwise sound. Heavily affected or dying stems may call for a different response. Avoid pulling a large stem through the whole patch if that would damage healthy growth. Follow appropriate advice for disposing of suspect material and clean tools before working on neighboring plants. Keep enough open soil to recognize the first point of new growth when the season turns.
If an old patch has become congested, consider division at a suitable time, often early spring. Lift a manageable section and retain vigorous parts with healthy roots and growing points. Replant at the right depth and give them room to expand. Measure mature gaps again, rather than returning every small division to the same tight strip. A clean edge at ground level helps you observe how the plants settle before the upper stems meet.
Leave a gap behind the low plant
After the first winter cleanup, view the gap from directly above. A new aster shoot close to the front clump can still be moved out of the way before the leaves meet. Leave a good portion of the base exposed from at least one side. If the lower neighbor spreads by runners, check below the surface before you treat the entire arrangement as two independent clumps. Two small crowns that mix under the ground can quickly become harder to divide than either would be on its own.
If the front layer is young and you need a little extra cover for this season, set a portable pot near the front edge. Put it where the base of the aster still receives air and where you can move it before working on the stems. This can show whether you need an additional perennial at all. Try a position a little farther to the side before giving up access. Seen from the path, a lower plant often covers enough of the aster's bare base even when their roots are several inches farther apart than you first thought.
Choose the best view you had in autumn
Keep a record of flower height and the main flowering period in your location. Look at which side had enough room after rain and which lower plant did the best job of softening the view. Where the tall stems worked from a distance, reserve that shape and keep the access between plants. Where the view was cramped, try a smaller plant next season or move the front clump enough for air and light to reach the base. Let the actual border tell you how much height to keep and how much change a small early pinch produced.
Further reading: NC State Extension profile of New England aster.