7 min read
Set Japanese Painted Ferns Against a Darker Ground
Find a place where Japanese painted fern holds its silver color and stays comfortable through summer.
On this page
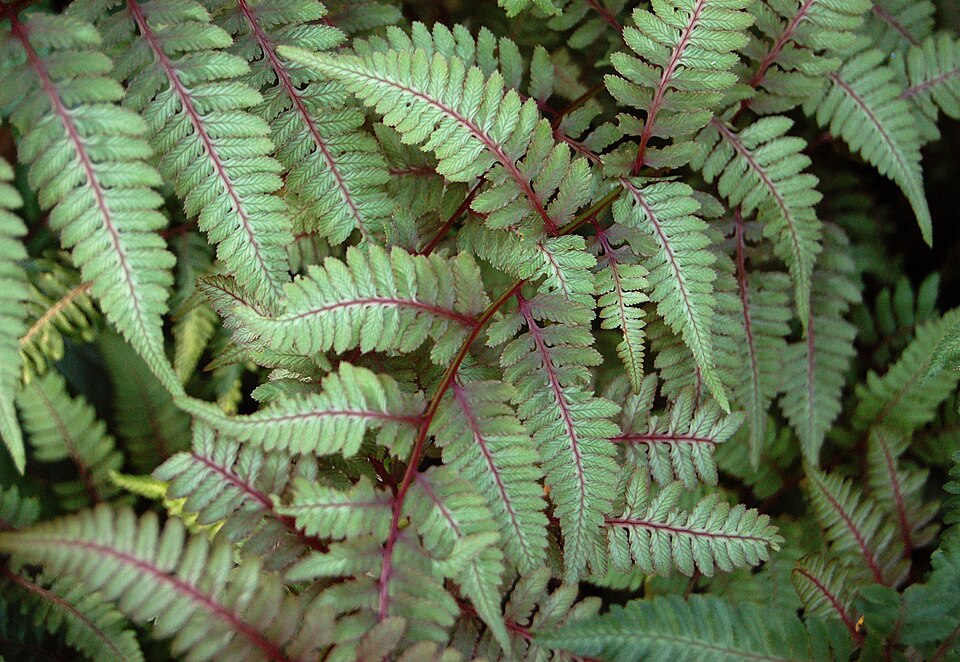
In a shade border, the Japanese painted fern draws the eye across the ground. A fan of narrow leaves sends a streak of silver between larger green shapes, and a purplish stem shows where each frond begins. The colors can be quite muted when you see the plant from above in a crowded pot. Set it against a quieter patch of ground and the same fronds can be visible from several steps away. The aim is to find the light that shows those colors while keeping the soil around the roots from drying repeatedly.
Japanese painted fern, commonly sold as Athyrium niponicum var. pictum, makes a low mound and generally goes dormant in winter. Think of it as a plant to look across or down at from a path. It can disappear behind a large hosta or a rough stretch of tall groundcover by midsummer, even if it grows well. Use the minute it takes to walk back from the border and look again. The place that feels right while you are kneeling can be hidden from every other angle.
Look at the shade when the fern will be in leaf
Visit the spot when the overhead branches have leaves and the sun is high enough to reach between them. Broken or indirect light often brings out the painted fern's color. A few hours of brighter morning light may suit a moist site. A narrow beam of late afternoon sun on a dry corner can scorch a frond surprisingly quickly. Distinguish those two situations before deciding how dark the whole border is. In a hot climate, provide more shelter from strong sun and drying wind.
Check whether the shade is cast by a building, a closely clipped evergreen or a high deciduous canopy. Buildings sometimes shelter one strip from nearly all rain. Evergreen branches can keep it dry or obscure the fern all season. Beneath a deciduous canopy, the soil can look moist in spring and then change rapidly. After rain and after a dry week, feel the soil below the loose surface in the places you are comparing. A firm planting spot that retains moisture without turning into a puddle is more promising than a dry hollow in full shade.
Put an empty pot where the fern might go and walk your regular route. If the pot vanishes behind something before you reach it, move it forward or find a place where the neighboring plant's mature leaves sit behind it. Along a broad bed, a fern can mark a change in the edge. In a narrow bed, leave enough space for the fronds so they do not lie across a path where an ankle or garden cart will brush them repeatedly. The width on the plant label is worth checking before you make the hole.
Try the color next to the plants you already grow
A dark, plain background often works. Place a nursery pot beside a small evergreen sedge, darker green leaves or spring mulch and stand a few feet away. That background makes the outlines of the divided fronds easier to read. Another variegated plant can work too, but the mix needs enough room to see each shape. If a long run of different small plants feels busy, repeat two or three quiet shapes around the fern instead of buying another conspicuous neighbor.
Compare potential nursery selections in shade. Their foliage can range from soft gray-green to a brighter cool silver, with different intensity along the midrib. An unusually pale plant under shop lighting may look less distinct outdoors. If you can see a mature specimen at a local garden, notice how the leaves appear in its ordinary position. Select for both appearance and size. A more upright form can rise above low foliage, while the edges of a deeply arching type may need extra room.
Consider what the border looks like before the fern emerges and after it goes dormant. A small clump of spring flowers ahead of it can complete its own season while the fern is still low. Nearby plants with attractive winter structure can occupy the broader view without covering the fern's crown. Keep the plants close enough to work together while leaving access on at least one side. You may need that access to refresh mulch, remove slugs or lift a division after several years.
Plant at the level it already grew
Plant in a cool, workable period when the soil can stay moist and you can keep up with watering. Dig a hole wide enough for the root ball and avoid deepening it just because the soil below is soft. When you lift the pot, handle the roots or the outer edge of the root ball, leaving the closely packed bases of the fronds alone. Set the top of the root ball level with the surrounding soil. Fill in around it and water slowly. The compost in a small nursery pot can be very different from the ground around it, and water may initially move past one medium more easily than the other.
Light mulch can help if the site is prone to drying. Leave the central crown open and make sure coarse leaves or tall bark chips have not tucked themselves among the shoots. Where compaction is the main issue, choose a better spot or improve the structure of the wider bed as appropriate before adding more plants. A deep isolated pocket of soft mix can hold water after heavy rain. Check the place as a whole and make use of well-drained ground that already stays moderately moist.
Mark the position if the fern goes in late in its growing season. It can be hard to spot a dormant crown among falling leaves. Put the label on the path side, far enough from the center that it will still be reachable when the fronds open. Add the cultivar and the date if you are deciding between several forms. A photograph from above records the distance to nearby plants, which is handy before you put in spring bulbs or weed a bed with few visible landmarks.
Use the fronds to direct your next check
During the first warm spell, check the growing medium several centimeters down near the side of the plant. Apply a thorough soak if it is drying, with enough patience for water to reach both the original root ball and the nearby soil. If leaves crisp mainly on the side where late sunlight reaches them, look at the hour and duration of exposure. If the entire tuft droops or dries steadily, check the moisture lower down and the amount of competition from neighboring roots. An isolated row of holes in tender foliage suggests checking for slugs on a damp evening. Keep the causes separate so you can address what you actually find.
Once the fern is steady, allow it to show new growth before changing care based on old damaged leaves. Older fronds may become untidy when bruised, dried or bent. Cut fully dead or badly collapsed leaves with clean snips if they get in the way, without reaching into new croziers. If several plants in the bed are suffering during the same weather, look for an adjustment you can apply at that scale, such as watering more thoroughly in one trip. A plant that persists at one end while the rest decline can show you where the ground and shade are working together.
At the end of the season, browning is normal for a deciduous fern. In spring, remove clumps of dead foliage from the crown as new growth begins, working gently where emerging tips are close to the old stalks. Where loose material already falls away, there may be little to do. Try to avoid stepping into the bed while the ground is saturated. A small set of stepping stones outside the plant's root area can improve access to the back of a narrow border through the whole year.
Divide only when you have a clear reason
An established fern can usually stay in place for several seasons. Divide a healthy plant when you need another clump or when the original patch has grown beyond the space. Work while conditions are good for re-establishment, often early in spring, and keep roots from drying while they are out of the ground. On a clump with distinct growing points, take a section with a viable crown and a share of roots. Replant the original and the piece at their previous depth, water thoroughly, and watch them closely during the first hot days.
Compare the two positions as the fronds expand. The younger division may be smaller and easier to miss in its first year. The older clump can tell you whether the basic combination of light and soil remains healthy. Once you know where its color lasts and where watering is manageable, a second planting can repeat it at the next place where the eye needs a pause. You will see the grouping clearly if each fern still has room around its outline.
Further reading: NC State Extension profile of the Japanese painted fern.