7 min read
Shape a Gooseberry Bush for Two Kinds of Picking
Keep the thorny center reachable, then choose a slightly underripe cooking crop and fully ripe dessert fruit by texture.
On this page
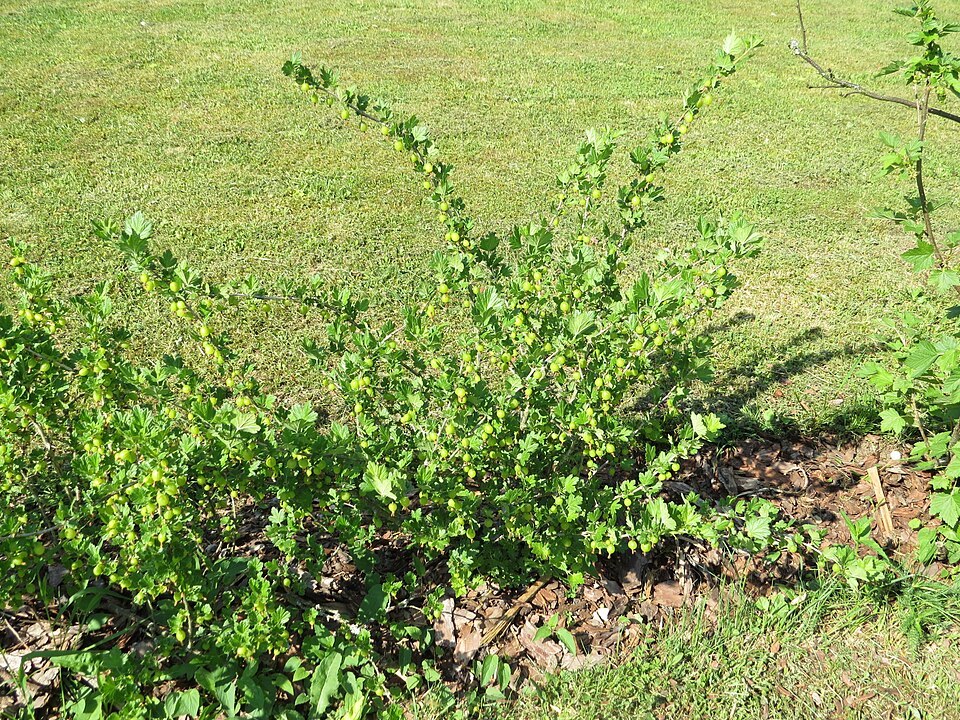
A gooseberry can fill the middle of its bush with fruit you cannot pick comfortably. The stems arch, the thorns get in the way, and the softest ripe berries can sit directly behind the firmer ones you meant to take earlier. Start the plant where you can reach it from more than one angle. Then keep the framework open enough that two visits produce two different harvests, rather than one hand pulled mix of all stages. The bush will look much larger by the time it carries a proper crop than it did in its nursery container.
European gooseberry, Ribes uva-crispa, is one of the species grown for fruit. Gardeners may also encounter American species and interspecific hybrids. Select adapted cultivars and check local rules before ordering or moving any Ribes, since requirements may vary within a region. White pine blister rust involves Ribes and five-needle pines in its usual disease cycle. Resistant cultivars are available, but cultivar choice and local requirements are separate matters. Confirm what is allowed where you intend to grow it and choose reputable nursery stock.
Give the future framework room before planting
Look for open sun and a root zone that drains. Some shade may be tolerated, while a brighter suitable site often gives more fruit. Look at what the branches will do when carrying berries. The space near a path may be well lit and close to the kitchen while leaving too little room around the spines. Mark the expected mature spread on the ground. Reserve enough clearance that you can approach without leaning into branches every time you pick. If you have only a very small site, ask for a locally suited compact or lower-thorn selection.
Make an access point on the far side if you can. It need not be a paved path, only a safe place to stand and reach into the outer bush. Near a fence, put the shrub far enough away that you can see where side shoots lean. A bush completely backed into a corner can make older wood difficult to renew because only the front is reachable. Use the same marker to check how the surrounding soil drains after rain. A low soggy position is a poor trade for having the harvest close to the door.
Many cultivars can set fruit with one plant. That may be enough for a small garden, especially when the bush is grown to be easy to pick. Read the cultivar description and compare expected habit, thorniness, disease response and ripe fruit traits. A full crop from one well placed bush can be more usable than fruit from two squeezed together. Keep the label after planting. It will help you judge mature color when the first usable fruits appear.
Build a framework you can see into
Give a young bush time to establish in workable soil. Plant at an appropriate depth for the stock and local recommendations, water it in and maintain reasonable moisture. Protect the root area from weed competition without piling material against the base. Do not remove every thin young stem simply to make it look like an older plant. Keep useful strong shoots and remove damaged or badly crossing material where appropriate. Look for the branches you will be able to work around as they grow.
When an established bush has lost the opening in its center, inspect it in dormancy where that is the recommended pruning time. Mark damaged wood and identify the oldest stems. Renew the framework gradually by keeping healthy young shoots and removing selected older wood as needed. Fruit can occur on younger wood and on productive framework several years old, depending on its age and vigor. Taking every older branch at once can remove part of the harvest. Use local guidance for a mature plant and leave enough wood to carry next season's crop.
Watch for low shoot tips that touch the soil and begin to root. Lift or remove selected tips when appropriate if you want the bush to remain in a defined space. A solid opening below one side can make it easier to see which stems belong to the main crown. Wear gloves and use sleeves where they will protect you from the thorns. Check the path after pruning. The useful result is that you can see and reach fruit without pushing an entire sleeve between stems. Keep a few strong arching branches where they do not block that reach.
Label the fruit before the first cooking harvest
Pick at the stage the cultivar and intended use call for. Slightly underripe fruit is used in some cooking and tested preserving recipes. Follow a reliable tested recipe if you are making a preserve; the growing guide does not determine how it should be prepared or stored. Choose sound berries from one accessible section and leave some intact to ripen farther. Compare the firmness at the first useful stage with the variety's description of full maturity. A later dessert pick should feel and taste different, even when both stages are in the same basic color range.
Do not rely on redness across all gooseberries. A cultivar may be green, pink or red when ripe, and shape and texture vary. A sound ripe berry often softens somewhat, becomes sweeter and loosens when you pick it. Support the branch lightly and avoid detaching several berries while you take one. A shallow container keeps both stages from being crushed by their own weight. Use standard produce hygiene and cool sound fruit promptly if you will keep it for later.
Make one early record of the weight or amount and the condition of the fruit you kept. An early pick intended for cooking can be a small trial. Where the bush is thin or has only a few berries, let enough remain to judge the fully ripe stage. If the later fruit matures in shade or after a cooler period, note the condition rather than assuming the entire garden should be picked in the same week. The best route to one side can be useful at both stages even if all fruit does not mature at once.
Keep the routes available while fruit is on the bush
Check the shortest way to each section once the branches carry weight. A low stem lying across the ground may hide berries in grass or brush against soil. If a sound branch can be brought slightly to the side without breaking, work gently and leave it accessible. Avoid tightening a bundle of fruiting stems together so much that the inside becomes harder to see. A branch that regularly settles across the only path can be addressed during later pruning, when its structure is visible. In the meantime move the picking basket rather than pulling on the stem by the fruit.
Separate damaged and overripe fruit as you work. Look closely behind the older branches if sound ripe berries are hard to find. Keep the bush appropriately watered through dry spells and allow the ground to drain. A sudden crop problem affecting many leaves or berries deserves a diagnosis before making a drastic change. Take pictures and seek local horticultural advice if symptoms recur. Good access makes it easier to observe a developing issue in time to get useful details.
Make the two harvests easy to distinguish
Carry two shallow containers when enough fruit is maturing. Mark the one for the firmer berries and the one you will use for the softer ripe pieces. Keep them set beside the reachable side so each berry has somewhere to go quickly. If you only use one stage in the kitchen, collect only that stage where the fruit is sound and let the rest finish normally. A record of size or color is useful only when you know which container it described.
During the first trial take berries from both the outside and an accessible part of the center. The outer ones may have spent more time in direct light, so note whether the texture differs. A berry hidden under several leaves might be ready before the one you have watched at eye level. Use a short visit to check the covered sections before bringing a large basket. If you rarely find ripe berries there until after they soften too far, aim your next framework pruning at making that part visible. Leave the productive shoots that you can reach safely.
Keep a short picking record for the following year
At the end of the crop, note which side gave you the first usable cooking berries and which gave you easy dessert picking. Add the ripe color, the degree of softness and the cultivar name. If only one side was convenient, make the next renewal cut with that observation in mind. Leave productive stems elsewhere if you can give them a clear approach. A properly placed gooseberry does not have to lose all of its character to be easy to pick. Give the main branches their space and keep two useful visits in mind whenever you decide which one to leave.
Further reading: University of Minnesota Extension guide to currants and gooseberries.